Search This Blog

Cpx24.com CPM Program

Interview With Ryan Nall of Zoogma for NewTimes Broward/Palm Beach 2011.10.28

Saturday, October 29, 2011

Repost of my interview with Ryan Nall of Zoogma for the NewTimes Broward/Palm Beach found here.

Zoogma's Ryan Nall Explains What the F*ck His Band is About

Categories: Q&A
Zoogma_Facebook.jpg
Facebook.com
The live electronic five-piece Zoogma has left its Northern Mississippi home to tear it up all festival season. In between touring, some noteworthy appearances included major festivals like Wakarusa to Camp Bisco X. The quintet utilizes the auditory diversity and pinpoint musicality of DJs to reproduce a traditional dance music intonation that is porous enough to skillfully dab on traces of rock, jazz and hip-hop. The end result is a high-energy, well executed sound that continues to evolve and push the boundaries of exploration.

This weekend, the band returns to one of its favorite places to perform. Prior to tonight's performance at Culture Room, Zoogma's Ryan Nall (bass/synthesizer) took some time with County Grind mid-run to discuss what the fuck Zoogma actually is, and the future of live electronica.

County Grind: Zoogma offered your music for free in the past, and plan to do the same in the future. How important has that approach been in explaining your success from a touring perspective?

Ryan Nall: We like the idea of giving our music away for free, and we believe that has helped expose our music to a lot of people. We believe in our live show, in the distinctive experience that is a Zoogma performance, so much so that we feel like if we give away our record people will be driven to see the music executed live. We take the material in a lot of different directions live, freeing it up and improvising, so you get a similar experience to the album, plus a lot more.

Anyone that went to a Florida music festival in the last year is familiar with your slogan, "What the fuck is Zoogma?" How did that phrase come about and is it safe to ask about the enigma?

We started the campaign at Bear Creek 2010 as a way to raise awareness about our band and festival slot. The viral success of it has been amazing and more successful than we could have imagined. Now we feel as though you only ask if you already know, a kind of battle cry of our fans and mantra of the band. Plus it's always fun to say it at a festival and see what response you get.

Do you see direct correlations between grassroots marketing and word of mouth tactics in regard to the traction Zoogma has gained since the first studio release?

The fact that last year we started asking people at Bear Creek "What the fuck is Zoogma?" and now people all over the country use that slogan as a battle cry at shows make me think that we're onto something.

You are hopping around the state on a four night run, including a date at the Culture Room. What have your experiences been like playing to the Florida crowds?

Florida has been very good to us, the fans we have here are some of our most diehard. Also, as a state in general, the crowds are very grateful and appreciative and always ready to give us the energy we need to create the best versions of our music. The festivals we play here, Bear Creek, Aura, Blackwater, Purple Hatters Ball, and Big & Hearty are usually some of our rowdier festival sets. The connection between the crowd and our band is profound. We're very grateful and proud to be a part of the music tradition here.

Where do you see the future of the live electronica moving in a world dominated by producers, and more importantly, where does Zoogma fit in?

It's tough to say, I believe a lot of the music community have been surprised by the success and influx of DJs and producers across the scene. We see it as a good thing that so much electronic music is being produced and that the genre itself is gaining popularity. We also look toward the future and see that our live instrumentation and abilities as producers is what sets us a part and makes our show a more dynamic electronica experience. Because we can replicate the sound and aesthetic of a DJ as a group of live musicians we feel we offer fans of electronic music a very unique and powerful thing, something they don't get with most DJ and producers.

Have you ever considered attempting to devolve the mash-up technique back to the instruments and execute that approach to electronic music with a full band?

Interesting, kind of a live band Girl Talk concept? It would certainly be interesting to tackle a project like that as a group. We like reinterpreting other artists, and kind of adding our own Zoogma edge to their music. We currently have been playing around with a similar concept. A DJ or producer takes recorded music and remixes it and we've been taking DJ's and producer's music and rearranging it for a live band. We've experimented [with] a Sub-Focus track most recently and have had a lot of fun realizing there music as a live band. In most cases this has never been done before because their music was composed by one person using a digital audio workstation.

Zoogma. With Sounduo and Beat Thief Inc. 9 p.m. Friday, October 28 at Culture Room, 3045 N. Federal Highway, Fort Lauderdale. Tickets cost $10. Click here.

Read more...

The Book of Questions: Question 10

Thursday, October 27, 2011

I hope you all are having a great week! I've been really busy and tired this week, but I'll be sure to give you some good new stuff next week.

Until then, my good friend Gregory (actually, I've never met him) has another question for you all!

For those of you not familiar with my The Book of Questions feature, I select a question from this book by Gregory Stock, Ph.D., write my response, and ask for your response. This is my seventh time featuring a question, and I'm using the tenth question in the book.

QUESTION 10:
Which sex do you think has it easier in our culture? Have you ever wished you were of the opposite sex?

MY RESPONSE:
In America, men definitely have it easier. However, I think women have come a long way.

No.

Let me know what YOUR RESPONSE is! Is it any different in your culture?


Picture citation: http://cultivatedcoaching.files.wordpress.com/2010/11/questions2.gif?w=304&h=320

Read more...

MagnoliaFest 2011.10.20 - 2011.10.23 Spirit of the Suwannee Music Park Like Oak, FL

Design by Ariane B. Davis 

The Fall season in Florida might not have the aesthetic transformation of our Northern counterparts, but the music climate certainly changes and takes a turn for the great. Dedicated patrons flock down to the peninsula for moderate temperatures balanced by choice weather and copious amounts of sunshine. The Spirit of the Suwannee Music Park becomes the ideal venue for music spectating and camping for East Coasters hell bent on pushing the congested festival season a few months further.
This past weekend a smaller, more intimate gathering of bluegrass enthusiasts, folk faithful and jam rock addicts invaded Live Oak to witness four full days of power players like moe., Bela Fleck & The Flecktones, The Travelin' McCourys with Keller Williams, Railroad Earth, Cornmeal, Steel Pulse, 7 Walkers, Col. Bruce Hampton and a collaboration between Toubab Krewe and The Infamous String Dusters.
After a stacked day proceeding them, moe. set the pace on Friday night with a standout marathon set pushing close to two and a half hours. When they took the stage the crowd couldn't have been more than 200 people, but an explosive twenty minute "Meat" opener got the ball rolling in the right direction.
A string of segues came from the Wormwood pairing of "Not Coming Down" and "Wormwood" before slipping into the monster twang-rock anthem "32 Things."  The temperature dropped significantly during the 47-minute sequence, and bassist Rob Derhak was quick to point out, "damn it's cold, I think my oranges are frozen."
The set coasted to a particular strong "Wind It Up," but the true highlight was a smothered "McBain" sandwich with an extended "Time Ed" serving up the heat that "Meat" had started at the beginning of the set.

The combination of cold and an older crowd didn't provide much in the way of a post-party beyond personal camp fires and RV private sessions. An unusual, yet calming quiet camping experience where I was set up allowed for a good nights rest and an early start on Saturday.
Catching up on my exploring, a wandering mission from each of the four stages to the next provided a better representation of the individuals that comprise MagFest. Most of them are Southern baby boomers using the weekend as a vacation with activities geared towards setting up camp chairs in front of stage and watching some of the most talented musicians in the country show off. Booze were flowing in a moderate fashion and the energy is subdued yet intent on catching each note.
A series of sit-ins and unsuspecting collaborations defined the marathon of foot stomping good sets. Jim Lauderdale welcomed the String Dusters to the Amphitheater Stage for a few true blood bluegrass songs. The Lee Boys brought out the bass master Victor Wooten for an earth shattering guitar duel. The Infamous Krewe, a Toubab Krewe and The Infamous String Dusters super-group, has some sound problems but eventually the combination of the two groups resulted in an interesting melding of the former's psychedelic afrobeat and the latter's string work.
Back in the enchanted forest vibe of the Amphitheater, Cornmeal was setting the stage on fire and took it to fifth gear with an extended sit in by Bela Fleck during "Shady Groove."
When Bela reunited with the Flecktones later that night they would bring out violist extraordinaire Casey Driessen to add some textures and build up to more than one peaking jam during the 90-minute set. Just when the uniqueness of seeing all these musicians creating and improvising with each other couldn't get much better, lap steel guitar prodigy Roosevelt Collier stole the show when he sat in for "St. Augustine" and "Downward Facing Dog."
That would be the highlight of the night, along with a 25-minute "Recreational Chemistry", as the Buffalo jam rockers took a more relaxed approach, and played their all too familiar standard festival set style.

A lazy Sunday brought multiple encore presentations from bands booked the day previous. All in all, MagnoliaFest is an unsuspecting weekend with lots of room for fun and lacks the hectic nature that comes with bigger events boasting taller lineups and higher capacities. Having braved the weekend solo, I managed to make some new friends and for once a festival felt more like a vacation. Suggestions for future attempts would include a prime recreational vehicle, a crew rolling deep and more whiskey.
A big thank you to Marcus Barnett for getting these recordings of moe. up so quickly and letting me post them here.

Read more...

Nail Art Designs From Asto Jiwo 2011

Wednesday, October 26, 2011

Nail Art Designs From Asto Jiwo 2011

Nail Art - A Brief History


3000 years Before Christ the Chinese used enamel on their fingers. They applied the substance and left it to sit for several hours, the result; a pink finish on their nails. This was the beginning of nail art and the earliest records. The Indians also practiced nail art in a similar period using a dye derived from the Henna plant. This sometimes implied a social significance. Egyptians were another civilization that used nail art early on. The colour of ladies nails were used to identify what class in society you were in. The higher class wore deep shades of red and lower classes wore pale shades. Another mother of nail art was the Inca civilization who actually painted images of eagles on their fingertips.

The modernization of nail design began early in the 19th century. Orange wood sticks were developed in Europe beginning the process. Modern manicures began with this invention around 1830. The popularity created business opportunities and salons started to pop up across the US by late 19th century.

After the creation of the automobile and more importantly the mass production of them, a new range of paints entered the market on the demand of car enthusiasts giving new life to nail art. One of the first design to become poplar was what was knows as the "moon manicure". This nail art design involved painting the middle of the nail while leaving the moon of the nail unpainted.

The next revolution came from he Revson brothers, with their invention of a new kind of nail enamel and their creation of the company Revlon. The third partner in the business was a Charles Lachman who inspired the "L" in the middle of the company name. Their use of pigments instead of dyes changed the industry dramatically. This allowed for new colours and designs to quickly be adapted. The success instantly made Revlon an industry leader by 1940 and it was clear that nail art was here to stay.

As time moved on, nail art became a symbol to communicate between subcultures. Goths for example started to sport black nail polish, as did rock stars and punks.

Since then, nail art has become more creative and artistic. Many trends have come about such as the addition of symbols and crystals, air brushing, acrylic and gel nail enhancements. Nail art has become integrated into the world of fashion and is now sported as an accessory to any look.

The latest's in nail fashion? Nail wraps such as the metallic nails range. These wraps are pre-printed designs from a digital printer, allowing for complex patterns and reflective metallic finishes that are not possible through traditional methods. They are applied with heat activation and allow for designs to be finished in a fraction of the time. Not only this but they protect nails from scratches and don't chip like traditional products. They last for over 1 month and truly are the latest breakthrough in nail art.

Metallic Nails is the first Australian distributor of the Trendy Nails Unlimited product range, straight from the USA. Trendy Nails Unlimited (TNU) is a spankin' new, cutting edge invention for designing stylish, eye catching nails. TNU allows you to choose from a myriad of creative designs. This provides you and your client access to the up and coming, 'trendy', fashion forward designs you'll both love. TNU partners with any acrylic or gel system for an amazing finish.


Nail Art: Nail Salon


Nail art is one of the latest crazes among youngsters nowadays. They can pick or choose any design they want that suits their preferences and their lifestyle. Hence, most of girl teenagers are spending their time at a nail salon. There are experts at salons who take charge of pampering of your nails.

Nail art is the practice of painting decorative designs on your fingernails. It is a fun way to brighten up your everyday appearance or embellish a special occasion getup. This dash of style definitely will help to complete any outfit and truly show the personality of anyone who holds it. There are a variety of art designs available on your favorite nail salon ranging from simple and understated to trendy and outrageous designs. For example, you could choose to paint dots, flowers or you could put stickers on your nails for a get-together or spell out the name of your favorite celebrity or band or it could even be your name. The more convoluted the designs are, the best it is left to a professional.

And since nail art seeks to suit your needs and attain the expected look, it is widely available to consumers. Many nail salons are competing; each with their own packed products like nail accessories, nail tools, nail art charms, Swarovski rhinestones, airbrushing supplies, IBD UV Gels, IBD Soak off gels, Gelac soak off gel polish, IBD acrylic liquid and powders, Trendy Nail Wraps to name a few. Services like nail arts, nail enhancements, airbrushing, express manicure and creative spa manicure are also available. So, what are you waiting for?

There is a nail design for every person. There are lots of options available in terms of nail art designs. Most of them are affordable and do not take too much time at all, being available even for the toes. Discover yours and let your imagination go wild of course with the help of the experts. So, go grab your purse and be on your way to the nearest nail salon in your locale.


Acrylic and Japanese Nail Designs: Masterworks of Art


Nail designs are considered to be pieces of art because just by using supplies for nails coupled with striking adornments, nails can turn into an outstanding work of art.

Since time immemorial, nails have become an epitome in making impressions especially in the busy world of fashion. These have been used to make fashion statements and are continuously evolving even up to the present times.

During the ancient civilization in Cairo, the well-renowned Cleopatra, queen of Egypt and the great mistress of Julius Caesar, painted her fingernails as well as the tips and the dorsal and volar areas of her hands. This was done not only as a customary practice to diminish nefarious spirits but was also done in the name of style and artwork. A perfect manifestation that this is true is the presence of lucrative solid gold manicure gadgets found in ancient Egyptian graves.

In the 17th century, men and women alike effortlessly allow their fingernails to grow up to 5-inches in length. This would signify that indeed they have lives full of happiness and enjoyment. With the use of gold embellishments or splints made out of bamboo, these long fingernails are safe from breaking.

As a form of metaphor, the nail is just like an artist's canvas wherein he can freely create anything out of his vivid imagination. Nail art designs are appealing to both men and women. With patience and constant practice, creating nail designs are very easy to do. All you need to have are only the precise nail accessories and colors.

Nail art designs can be made by using acrylic nails and Japanese art nail designs. In order for a female trendsetter to look more dainty and exquisite, she has to have nails that are well-groomed and good-looking. Unlike before where both men and women do not put too much effort in growing their nails, due to the upbeat of time, nowadays, it is a very enormous task for women to let their nails grow at perfect extension. Nails are prone to be bitten off especially when a person is under too much pressure or in extreme stress. Acrylic or artificial nails can be a choice for women who have the brittle nails and deficient nail growth. Acrylic nail art designs are most sought after because these can be used for tryouts while making the designs. These nails are glued on top of the true nails with the use of adhesives and these are made according to the size of the real nail. Designs of this type of nail can be customized in accordance to the ongoing festivity participated by the user.

Japanese nail art designs are famous because they look distinctive and attractive with the use of gleaming and catchy hues. With the creation of eye catching designs, these serve as a mirror of the artist's vivid and wild imagination. Traditionally, it is already sufficient when nails are trimmed and coated with nail polish. With the onset of Japanese art nail designs, nail polishing is no longer confined to colors only. In the modern manicure setting, artists are now using different kinds of embellishments from a wide array of designs ranging from simple beads to precious jewelry, feathers, glitters, boats and even calligraphy.


Nail Art For You


Perhaps the greatest feeling about leaving the nail salon is the beautiful nail designs on your hands and feet. Designs can be simple and sweet or intricate and stunning. It is truly amazing how much art can be squeezed onto just one nail, especially your big toe! We all love having our nails done and nail salons meet customers needs by inventing many different ways to decorate your nails. Suddenly, the notion of nail care is taken to a different level.

Nail Designs: Basics

Nail polish is the foundation of your design. It does not matter if you are using nail art or not, because nail polish is appropriate either way. If you desire the natural look, you can enhance the beauty of your nails simply by painting a clear gloss over them. If you want a classic look like the very popular French manicure, you need both white and clear nail polish at minimum. If you are at the salon, you may want to get nail designs. The color of your nail polish can make or break your nail art.

Your next decision will be to decide if you want to add any 3D elements to your nails. Fun accessories include gems, diamonds, stickers, and other nail decals. You can use one or several decals on each finger. Decals enhance designs like shoes enhance your feet!

Konad or airbrush nail art are other methods to get professional nails. With airbrush art, the technician uses an easy to apply spray system on your nails. He or she will lightly spray over the nail design stencil producing salon nails that dry in seconds! Konad involves stamping nail art. This is an at home product that you can use to get professional nails by stamping the design of your choice onto your own nails. Since it dries instantly, the nail art is both beautiful and flawless.

If you haven't noticed, products are invented every day showing you how to do things yourself. People finally started to realize that it isn't very hard as long as you have the proper information. I mentioned earlier that nail designs can be simple or intricate. If you decide to save money by doing it yourself, you can start off with basic designs and work towards mastering more detailed designs. There is also a sense of accomplishment, I believe, in not relying on nail salons to get the job done!


The Joy of Artistic Nail Art


Nail art is a beautiful art that is a popular fashion trend in the recent times. Nailpolishing, manicuring, pedicuring, and nail-decorations are all integral part of this artistic art. Women today are becoming more and more fashion conscious placing more concern on their overall appearance. The overall look covers the way they dress, shoes they wear, their hair style, and of course the beauty of their nails.

It's truly been said that clean and beautiful nails speak a lot about you and your personality. Nail care is ignored by many women thinking that who looks at it but the truth reveals that it is one of the most significant aspect of a glamorous look. This trend of nail care and beauty has given birth to nail art.

In the present era, women are experimenting innovative and creative ways to beautify their nails. Modernity has further contributed to the innovation and has given a completely new form to the nail fashion. Today, there are various designs and decorations that make your nails look beautiful and trendy. Some of the hottest trends are the French Manicure, nail-extensions, nail-piercing, nail-paintings, and acrylic nails. From the simplicity of polishing to the most sophisticated nail-art, there are numerous ways you can beautify your nails.

French manicure is characteristic of natural pink base with a white base that delivers a simple yet elegant look. It is one of the latest trends revolving around the fashion industry. Then there is a huge assortment of nail art designs that involve the use of various decorative and embellishments like dried flowers, beads, glitter, fabrics, bindis, stickers, crushed shells, and sequences. All these creative decorations offer a glamorous look to the overall appearance.

Furthermore, there are nailpaintings in variety of shades and designs. Vibrant colors like gold, silver, blue, green, and red are the highly in demand to improve nail aesthetics. Water marbling and airbrushing are the most popular form of nail paintings. Apart from that geometric design, floral patterns, and tattoos look charming.

Acrylic nails have created a rave in the industry that has made many women crazy for the look and feel of these nails. These are artificial nails that are temporarily fixed to natural ones to hide various flaws like yellow nails and brittle nails. Some even use these to free themselves from the habit of nail biting.

In all its forms and types, nail-art is successfully winning the hearts and minds of people. It not only enables you to make a style statement but also boost your self-confidence. Apart from that the high level of satisfaction and in-depth happiness you feel is beyond compare.

Read more...

nail art designs From Asto Jiwo 2011

nail art designs From Asto Jiwo 2011

Nail Art Designs - Nail Care Preparation


Before you get to the creative part, you must first prepare to do your own nail designs. In other words, it is best to give yourself a quick manicure or pedicure before applying nail art. Beautiful bare feet look great in a nice pair of shoes, but not if you have dry, ashy feet. You want your feet to appear radiant by using the right foot care products on them.

If you already take care of your hands and feet, you may only need to apply lotion before doing your nails. At a minimum, wash your hands or feet and apply lotion. After applying a moisturizing lotion, take a towel and rub it well across each nail. Also use the towel on your hands. This will remove any oils on your nails so the nail art stays in place when you apply it later. Next, you should trim your nails into the shape you want them for your nail designs. Usually, people follow the natural shape of their nails whether that is square, round, or triangular. A nail file can shape and trim your nails easily without removing too much of your nail.

Follow up by applying clear nail polish to all of your nails. This protects the nail and helps prevent nail polish from staining your nails. Choose a color of nail polish and apply it on top of your clear coat. Now you are ready to create nail art magic! Be creative and design your nails. Another article in this series will show you step by step how to do your own nail designs. If you are anxious to get started, you can dip a toothpick in nail polish and make flower nail designs. If you are using nail decals, pick one off carefully with a pair of tweezers and place it on to your nail. Finish with a thin layer of clear nail polish to keep it all in place and you are done!


Nail Art Designs - The Endless Possibilities to Get Your Nails Done


The nail art designs of today have come a long way from the one color application of the past. Today the sky's the limit with these accessories that people call fingernails. These can be dazzled up at a salon or even at home. There are plenty of supplies available in stores for home beautification of your own fingernails. They can be designed to match any outfit and for all holidays.

Hand-painted artwork is very simple to do. Most people find they can add flowers to fingernails with little difficulty. The background is best if it is a pale color with the petals on the flower being a much brighter color.

The center can be a lighter shade than the petals and the entire design can be added with the nail polish brush. You may need to have a friend help you out if you can only paint with your dominant hand. Salons will perform this flower creation for you for somewhere between 5 and 10 dollars.

There has been numerous times when you've woken up to find the imprint of your sheets in your nails, but now it is fashionable. Many people are adding texture to damp nails with objects around the house. If it isn't an imprint you are looking for, but a unique design, try adding a swirl with two paints. Paint the brighter color on the nail first and before it dries to add some cream or white drops with a toothpick. Use the toothpick to swirl with the two colors together. This may take a while to dry, due to the thickness.

The technique of airbrushing on designs is available at salons and can be done at home as well, if you own an airbrushing machine. It's a lot easier and cheaper to go to the salon to have this done. It only takes a short amount of time to spray on a design. Some add-ons that are easy to apply are decals, piercing, or rhinestones. These can be added on top of a fresh coat of paint. Rhinestones are either stuck into the wet paint or adhered to the nail with a special glue.

There are two types of decals that can be added to fingernails; decals that use water to stick them on and ones that require rubbing. Both are on a sheet of paper that has many other decals on it.

The decal of choice is cut out of the paper and placed on the nail, decal side down. The back of the decal is then either wet or rubbed, depending on the method needed. After this process, the paper is removed and the decal is stuck into place on the fingernail.

Fingernail piercings aren't painful, since they are only in the tip of the fingernail itself. They can either be a hoop or a stud, but no matter which kind you choose, remember not to get them caught in your hair. Nail art designs can be added for any occasion, holiday, or just for a change of pace. The limits are non-existent with the nail designs of today.


Nail Art on Acrylic Nail Tips


Women are becoming more and more addicted to buying different accessories and improving their looks even if it means spending over expensive things and the like. Manicuring nails is one of the most frequent beauty rituals that almost every woman is very fond of. Due to the undeniably outstanding development acrylic nail tips has been born. Acrylic nail art is one of the most loved accessories of women today as it can really make nails look a lot more appealing and sexy.

Designs and Form

Acrylic nail art is simply an artificial extension of nails which is often attached on the nails to give it a more sophisticated and sexy look. Acrylic nail art include different designs and forms that you can choose from. Here are some of the most common designs and forms of acrylic nail tips so you can familiarize yourself with them:

1. White square-shaped tips.

2. Pink oval-shaped nails

3. Dotted black and white combination

4. Floral-designed nails

Techniques

In making acrylic nail art, you must be familiar with the different kinds of techniques that those cosmetic experts have developed to further improve conventional making of acrylic nail tips.

1. You can use a smallest size of brush to make a cleaner finish without mess.

2. A toothpick is also a good tool in making designs for your acrylic nail tips.

3. It's best to use water based paint if you wanted to have a different nail art design every day.

4. You can sprinkle some glitters onto your nails to add more design on it.

5. You can also incorporate nail stickers to your designs.

Things you should remember

1. Always consider the best color combination that you will use for your nails. If you are going out for special event then you must always use the perfect color to much your dress.

2. Never forget to put a base coat and top coat to be sure that it won't wear out unexpectedly.

3. Do not forget to let the first layer to dry up first before putting or applying the next layer. Doing otherwise will result to a messy design.

4. Remember to put on enough amount of nail paint only to prevent messy outlines.

5. Choose the right design that would fit your personality.

6. Avoid making over-designed nails.

Acrylic nail art can surely contribute to the woman's beautification. This kind of accessory is very famous nowadays especially among teenagers and young adults. Most of them used to polish and design their nails in order to make them look sexier and more appealing. As a matter of fact, to prove its popularity even little girls are already fond of accessorizing their nails using nail stickers.

Acrylic nail art is not only helping women to improve their looks, but it is also helping these women gain more confidence and flaunt their beauty without any worries of being embarrassed due to having old fashioned nails. Nevertheless, women use this technology in order for them to flaunt their beauty without hesitations and setbacks.


Beautiful Fingernail Art Designs You Can Create at Home


With a little patience, it is simple to create beautiful fingernail art that is perfect for any occasion.

Allow your fingernails to make a fashion statement by adorning them with designs that express your individuality, complement your personality, and accessorize your wardrobe. From subtle and simple, to elegant, quirky, or bold, it is easy to dress your nails in styles without paying the expensive rates often charged by professional salons. And with all the tools and products available, you do not have to be a gifted artist to create stunning, breathtaking nails.

You can build your own fingernail art kit by purchasing various sized brushes, nail art pens, acrylic paint, and your choice of fun accessories. Add in a few pins, toothpicks, and paperclips, and you will be ready to begin creating beautiful, professional looking designs that will make a statement without breaking your pocketbook.

Add elegance to a simple French manicure with a row of gemstones or a gold metallic smile line. Have a little fun by painting the tips black, blue, or even orange. Use a fine tipped brush to paint white zigzags along the tip line, or use a toothpick to create a cluster of delicate dots.

Special occasions and holidays are a perfect time to experiment with designs and make your nails part of the celebration. Get in the holiday spirit by using candy cane nail stickers and silver glitter. Try a French manicure with green and red tips, or paint tiny bells and wreaths on each nail. Usher in winter by using the end of a toothpick or paperclip to create snowflakes from small white dots and delicate lines. Embrace the season of love with heart adorned nails, or capture the spookiness of Halloween with black polish and orange jack-o-lanterns.

Do you think you lack the artistic ability to paint intricate details? Why not try some easy-to-apply nail accessories that will add the pizazz you desire without a lot of work or expense. Create funky designs with metallic bullion beads. Attach sparkling gemstones or dainty crystals. Cover wet nails with a light dusting of glitter or choose from a variety of stickers and decals. Nail stencils or stamping kits will help you add interesting, perfectly formed shapes that are guaranteed to look so professional that all your friends will think you visited a salon.

Simple details can be added with very little effort. Use a toothpick to draw straight, wavy, or diagonal lines. Combine two colors to make checkerboard or plaid patterns. Draw a smiley face or colorful rainbow. Create a marble effect by swirling two colors together or form a pretty flower with five small dots and a center rhinestone.

With a few inexpensive tools, you can create beautiful fingernail art designs at home. Whether you are attending a special event, celebrating a holiday, or simply enjoying life, your fingernails can always be dressed and ready for any occasion.


Get Creative With Your Nail Art Designs


Who doesn't love properly manicured and well-groomed nails. Ensuring you get as creative with your nails as you are with your clothes is the industry of nail art designs. Today, the trend of nail fashion is greatly influenced by the various unique and creative styles that give a complete makeover to your nails.

There are numerous ways of making your nails look glamorous and interesting. You can paint beautiful designs on your nails with the help of nail polish or even acrylic paint and further accentuate the design with glitters, stickers, semi precious stones and rhinestones. In fact you can take your pick from a range of designs to match with your clothes and even special occasions and festivals.

There are designs that are especially apt for occasions such as Christmas, Halloween, Valentine and even special Bridal occasions. For Christmas you can coordinate a red and while color theme and use a fine brush to paint a Christmas tree, candy canes, stars, holly leaves, etc. For Halloween you can give a spooky effect to your nails by painting on them little skulls, vampires and skeletons. First you can use a base paint of black and over that use white or red to paint these spooky characters. On Valentine's you can make your nails look as romantic as you do by decorating them with red glitter, 3D heart stickers or semi-precious stones.

For every day use, you can deck up your nails with either a flower based or a puzzled based theme or get really creative and create your own theme to match with your personality, clothes and accessories. Also, airbrush painting is another great way to decorate your nails. The Japanese way of designing nails are also quite a popular method since it covers a range of elaborate adornments including precious jewels, boats, feathers, painting and even nail calligraphy.

Different methods can be adopted to create a variety of nail art designs such as painting objects and designs with a thin brush tip or blending colors on the nail through the help of a toothpick. Under this method you first use a toothpick to apply one dot and over that you apply another color dot with another toothpick. Therefore, you blend two colors to create a special effect on your nail. Besides applying, jewels, stickers and stones, you can even use the method of water marbling in which you add a drop of paint to the surface of the water which creates a marbled effect.

These are just few ways of creating innovative designs on your nails and with a bit of imagination and creativity, you can definitely come up with more interesting ideas as well. But before you get down to creating a masterpiece out of your nails, it is important that your nails are clean and you have all the essentials such as thin tip paintbrush, acrylic as well as nail paints ready. Nail paint is really interesting, enjoyable and creative and once you have got the hang of it, you can create several unique and interesting nail art designs.

Read more...

My christmas clip art From Asto Jiwo 2011

My christmas clip art From Asto Jiwo 2011

Christmas Clip Art


Christmas clip art is computer art images that give visual impact to your Christmas messages and projects. Even if you don?t have artistic skills, you can add more pizzazz to your electronic or printed Christmas cards, party invitations and personal web pages. You can use readily available Christmas clip art installed on your word processor or those offered by websites on the Internet.

Although you can find online clip art galleries for free clip art, you may also subscribe to websites that offer sure copyrights. Be sure you make use of these websites? search engines, so you will not spend too much time browsing through images one by one.

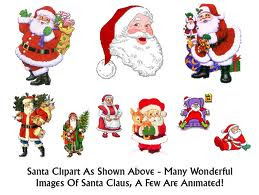
Among clip art images suitable for the Christmas season are Santa Claus, reindeer, sleighs, snowmen, gifts, mistletoe, stars, Christmas stockings, candles, candies, angels, bells, pine trees and Christmas lights. There is also a variety of ?Merry Christmas? text greetings and actual Christmas messages framed by pretty borders.

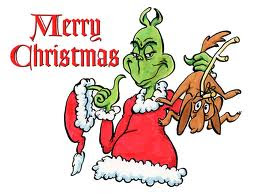
You can find an excellent selection of unique and humorous Christmas images, too. If you look through different galleries, you can find variations of the following: Santa sitting on a cactus with a bag full of Christmas presents, Santa stuck in a chimney, Santa and Mrs. Claus kissing, boys and girls on skis, elves with toys and candy, elves at work in Santa?s shop, baby Jesus in a manger, the manger scene, the three wise men bearing their gifts, and caroling angels. But these are not all. There are hundreds and hundreds of pictures for you to choose from.

If you want more dynamic images, there are cute animated cartoons with a Christmas theme that are available to you.

You can amass a collection of Christmas clip art and use them for beautifying different print projects, Christmas greetings and personal websites. If you use Christmas clip art as a background image, choose the right color and adjust their size so they will not obscure the text. Stick to a central theme and choose the images that are appropriate to the content of your message. Don?t over-decorate your piece with too much clip art.

Most Christmas clip art has been colorized, cleaned up, optimized and reduced in size, so they can be downloaded quickly. They also come in printable formats. Most have transparent or watermarked backgrounds so you can use them on colored pages.


Animated Clip Art


Animated clip art is very realistic and can be seen anywhere on the World Wide Web today. They can serve as decorations on your web pages, online greetings and electronic messages. Clip art also helps you create professional-looking emails, logos, mascots, letterheads, presentations, videos and even short films.

Animations are made up of sequences of still images called cells. The cells are arranged in order so that when they are displayed on the screen or in a consecutive series, they create the illusion of motion. The images replace one another very rapidly to fool the eye into seeing continuous movement. Animations play out over 14 frames per second. A typical animated clip art moves at 4 to14 frames per second.

Animated clip art has developed from two- to three-dimensional images. Animations are composed on a computer that utilizes a complex set of mathematical calculations to develop an object that appears from many possible angles in a given set of conditions. The shape, shading and linear perspective that result are very accurate. Therefore, the images appear to have depth, and their movements are realistic and natural.

Animated clip art is saved in graphic file formats such as GIF, MNG, SVG and Flash, which allow them to be viewed on a computer or on the Internet. You don?t need to install additional software to view them. Animated images work with all popular editing software.

Animated clip art is classified into categories. These categories include nature, business, technology, animals, sports, emotions, holidays, occasions. It is easy to search for images as most of them are grouped by keywords or search terms. There is also animated clip art for Halloween, Christmas, Valentine?s Day and other special occasions.

Sample PowerPoint templates and video backgrounds are available online to help you learn how to use the animations. Over 300,000 3-dimensional animated clip art files are compiled into 12 CD-ROMs or into a single DVD-ROM that can be seen on clip art websites. Just browse through their catalogues for price rates or subscription rates inquiries.

Make sure you choose websites that provide high-quality, royalty-free and copyright-safe animated clip art.


Holiday Clip Art


Holiday clip art is images that depict memorable events and special days that different cultures commemorate annually. You can use this clip art as background decorations for your web pages, greeting cards and party invitations.

A huge and excellent selection of colored clip art created specifically for national and international holidays is available at clip art websites. You can select from U.S. flags, rockets and ?United We Stand? statements for Independence Day; flag images with patriotic sayings, ?Remember our Heroes? images and a woman weeping at a grave for Memorial Day and Patriotic Day; and flags, eagles and stars with ?Made in the USA? statements for Labor Day.

You can also find clip art for secular holidays, such as Irish borders, shamrocks, lambs and bullets for St. Patrick?s Day; sailing ships for Columbus Day; saguaro cactus and colored sombreros for Cinco de Mayo; and groundhogs in different scenes for Groundhog Day.

You can search for clip art for Christian holidays, too. These include manger scenes, Christmas wreaths, Santa and Mrs. Claus, reindeers, elves, pine trees, stars and Christmas gifts. There are images of Jesus Christ, Mother Mary, holy saints, the Bible, crosses and churches that suit the season of Lent. Bunnies in baskets, flowers, lambs and Easter eggs are the perfect clip art images for Easter.

There is also holiday clip art of menorahs and Stars of David in various colors and designs for the Jewish holiday Hanukkah. For Kwanzaa, there are images of candles, ethnic boys and girls, and statements of social and spiritual principles.

Other popular holiday clip art includes cupids, hearts, singing blue birds, a small red heart inscribed with the words "I Love You" and a kissing couple for Valentine's Day; bouquets for Mothers? Day; witches, ghosts, mummies, graves and pumpkins for Halloween; and balloons, champagne and bubbles, party hats, fireworks and clocks pointing to midnight for New Year?s Day.

The World Wide Web is a great source of clip art for all occasions. Browse through the sub-categories of each website to access the newest collection of free holiday clip art.


Christmas Art Quilt Patterns


Once you find the right Christmas art, quilt patterns to showcase it generally fall right into place. If this is your first attempt to use art to appliqué a Christmas art quilt pattern, getting started may seem a little overwhelming. It's really easy when you keep these tips in mind.

First, select simple art. Maybe your first Christmas art quilt pattern design shouldn't be an intricate scene. Try starting first with a Christmas tree.

A Christmas art quilt pattern that centers on a Christmas tree can be very simple or more intricate, depending on your skill level. It could be as easy as stitching a large green print triangle for the evergreen and a small rectangle for the trunk.

Use your computer's clip art collection - or your favorite online clip art - for design inspiration. Once you find the Christmas art you want to use for your quilt pattern, print it out and you'll have your Christmas art.

Once you've selected your Christmas art, quilt pattern selection is next. Will you appliqué your Christmas art one large 12-inch squares or incorporate it into another pattern, like a nine patch? Maybe you'll choose to appliqué your Christmas art onto a large panel in the center of your quilt and border with several blocks of your favorite quilt pattern. It's up to you!

Maybe the Christmas art you want to incorporate into your quilt pattern is a favorite family Christmas photo. What an exciting way to create a family favorite!

There are a couple of ways to get your photo onto the quilt. I recommend putting the photo on a quilt block prior to piecing. In case something goes awry in the transfer process, it's much easier to cut another block than to create a whole other quilt!

Photo transferring is easy. The transfer paper is available at most craft stores. If you'll be printing the photo on darker fabric, make sure to get transfer paper especially formulated for dark fabric. Follow the directions included to create your photo Christmas art quilt pattern.

Another method of transferring photos is through direct to fabric digital printing. It will cost a little more than doing the transfer yourself, but the water-based ink goes straight into the fibers of your cotton fabric. The photo will be soft to the touch because it actually becomes part of the fabric.

Digital printing has long life, which is important if you plan to use the quilt and will need to wash it frequently. Some photo transfers do not last through multiple washings. Call area t-shirt printers to ask if they offer digital garment printing services. Most are screen printers so you'll have to ask for a digital direct to garment printer that does not use sublimation. Wording your question that way should help you weed through to find a good photo printer for your Christmas art quilt pattern.

If you're not interested in appliqué, there are several quilt patterns that have Christmas trees, bells, or wreaths pieced into the design. Choosing one of these traditional Christmas quilt patterns would be an easy way to create a holiday family heirloom.

If you chose to piece a Christmas art quilt pattern like that, appliqué wouldn't be necessary. To add your own flair to the traditional pieced tree pattern, you could embellish the trees with buttons, iron on rhinestones, rick-rack garland, etc.

Once you have completed your Christmas art quilt pattern, don't forget to sign and date the quilt. Use a fabric marker to sign your name and date the quilt. You may also choose to use simple embroidery to stitch your name and date into the quilt. Remember, your creation won't be complete without your name and the date on which it was completed!


Make a Christmas Card Using PowerPoint


Christmas is coming soon, but are you tired of sending Christmas cards in any old ordinary way? So, this year you would like to send a special Christmas greeting card-something a little different-maybe for a special person in your heart. If you have a personal computer with Microsoft Office software, the creative Christmas cards comes: why not create a Christmas multimedia greeting card with PowerPoint? It would not be that hard to create such a greeting, and while you could use simple clip art, you could instead add videos, a movie, even sound.

One advantage of creating a Christmas multimedia greeting card is that you can save your card as a template. After saving your creation as a template, you can reuse the card many times. You can create many cards based on the original.

Step 1: Create a New Slideshow

Open PowerPoint, from the File menu, click new. You will then be given the chance to use an existing template, a blank presentation, or to use the AutoContent Wizard. For our purposes, click blank presentation.

Step 2: Adjust the page size to whatever you desire.

Click page setup on the File menu. You can adjust the size to anything you want, but for our purposes, change the width to 7.5 inches, the same as the height.

Step 3: Set up the layout for the slide show.

On the Format menu, click slide layout. You have a variety of templates to choose from, but for our purposes, choose the blank one.

Step 4: Set up the slide show and the speed at which the slides will move from one to the other.

Click slide show, then slide transition. In the advance slide section, click automatically after box. Change the delay time to 00:03, and close the slide transition pane.

Step 5: What this step is would depend on whether or not you want to create your card from clip art, to add a movie, or a picture you already have.

Add a picture to your Christmas multimedia greeting card:

Let us say you want to create a card from clip art. Click picture on the Insert menu, then clip art. Do a search for the type of picture you want to add. Double click on the image you want to add. It will be added to the slide, unless you get a message that says you have to use a CD that came with your computer to use the image, in which case you will have to use the CD. You also can add download clip art to your computer from the Internet-sometimes for free-after doing a search for clip art. You will also find a link to a clip organizer, if there are any clips there on your computer and a link to clips online.

You can also format the picture, including the size of the picture in your multimedia greeting card created with PowerPoint. Click picture from the Format menu. Click size and then you can make the size of the picture however many inches in height or width that you want-at least if it will fit in your browser. Drag the image of the picture you inserted to the center of the screen.

Add a new slide to your Christmas multimedia greeting card:

If you want to insert a new slide, click new slide on the Insert menu. You can then follow the same procedures for formatting and adding clip art.

Add a movie to your Christmas multimedia greeting card:

You can add a movie to your multimedia greeting card which you make with PowerPoint, instead of clip art. Point to movies and sounds on the Insert menu and click movie from clip organizer. Click the desired movie-that is if your computer hard drive came with any movies to add, or if you have downloaded any off the Internet. You can format the movie the same way you would a picture.

Add sound to your Christmas multimedia greeting card:

You can add sound to your greeting card. Click movies and sounds on the Insert menu and then pick the sound you want to add from the Clip Organizer. You will also be given the choice to add sound from a file or any CD tracks you have saved to your computer. You may have sound elsewhere on your computer, but you should find sound files by clicking your C drive, then Windows, then Media. You should have a wide selection of sounds to add to your card.

Add text to your Christmas multimedia greeting card:

It is simple to add text to your multimedia greeting card made with PowerPoint. On the Insert Menu, click text box. Click and drag the text box below the picture, movie, or clip art you added. Drag the text box by the resize handles to whatever size you want. In the text box type your desired greeting, such as, "Merry Christmas." You can create a second text box below the first to add your name or the name of the recipient. You can size or format the text and the font color in whatever way you would like. Click on Format and then font. Choose your options.

Step 6: Save your Christmas greeting card as a template.

Click new on the File menu, and then save as. In the save as dialogue box, choose new template. Name your template.

If you think it is too troublesome to make a PowerPoint all form the beginning, you can also use some free Christmas PowerPoint Templates instead.

Many items such as photos, movies, sounds, background images, and border images are on the Microsoft Clip Art and Media Web Site and can be added to your multimedia card created in PowerPoint.

Step 7: Deliver your Christmas greeting cards.

Of course,you can send your elaborate Christmas greeting cards through e-mail as an attachment,but sometimes it is troublesome to send a PowerPoint file with sounds and movies. If you don't deal with the sounds and movies well, they will not play in the recipient's PowerPoint.Or the recipient has a different OS or he/she has not installed a PowerPoint app. in her/his computer,what will you do? Don't worry, here are the solutions:

Convert the Christmas greeting cards to video with Leawo PowerPoint to Video.So you can easily send it with an e-mail,and make it playable on a different OS or even without PowerPoint installing computer. What's more, you can upload the greeting cards to your blog, SNS or to video sites, and more crazily, you can send the Christmas greeting video card together with mobile device (for example iPod, iPhone, Blackberry etc.) you've chosen as a gift. That is a real surprise! Haha! But if the recipient has no computer or he/she knows nothing about computer, I'm afraid that you have to convert the Christmas greeting cards to DVD with Moyea PPT to DVD Burner,and send the DVD copy to he/she so that he/she will receive your warm Christmas greeting by watching TV. Really remarkable, isn't it? Why not start your own now?

Read more...

christmas clip art From Asto Jiwo 2011

christmas clip art From Asto Jiwo 2011

Creative Christmas Crafts Using Royalty Free Christmas Clipart Graphic Images


Creating simple Christmas crafts are one of the family traditions being practiced until now. These creative crafts only need material that we already see around the house.

We just have to recycle them and everything will look brand new. Once you buy a pack of Christmas clipart graphic images to download, you will receive instant Christmas images and have great results for many years to come, with just cut and paste and a bit of imagination.

Here are some of the Creative Christmas Crafts ideas for you to try out:

The Christmas Placemat

Using your old Christmas cards or some of your Royalty free Christmas clipart graphic images, select the pictures you want to use. Just print out and cut your selected Christmas graphic images. You will need three Christmas card regular sized images to make the Christmas placemat.

Glue the Christmas images on a sheet of colored construction paper. You can also write the child's name in bright colours or glitter glue, or add a photo of them to the scrap picture collage, so that they can easily tell which mat belongs to them at mealtimes when they set the dinner table.

Once the glue dries, cover the front of the craft and the back using rolls of sticky clear plastic contact. You can also just slide the picture placemat inside a plastic sleeve used in office clip folders. Then just sticky tape closed the open end of the plastic sleeve, to enclose it securely. This will make them waterproof and easy to wipe down after each meal.

Make sure there are no gaps or any open sides. Kids will love eating on their own plates with their own handmade placemats. These also make sweet homemade gifts from the kids to other family members.

The Santa Ornament:

This is great for everyone especially for the kids to give to their friends. Look for plastic ornaments at your nearest craft store.

Open these ornaments and then place your token gift or sweet inside it. Then close it again.
Using wooden balls for Santa's head, glue on a pair of jiggly eyes or paint some eyes. If you have Christmas clipart graphic images, you can cut out a picture of Santa's face and glue it to the ball. Glue the ball on the top of the ornament. Then add cotton to serve as his hair on the head, mustache and as his beard.

Glue a red felt hat cap on his head. Then at the middle of the bigger ornament, glue a strip of black paper to serve as his belt. You can glue a patch of black felt at the bottom to serve as the base, and Santa's boots. Make all of the body parts look like Santa Claus with bits of felt or coloured paper.

The Countdown chain

Cut green and red construction paper into thin strips. Search for used Gift Wrap so you can recycle those. You can decorate the strips with glitter glue and Christmas writing.

Form the thin strips into a circle, connecting the ends and then glue each of them. When the glue dries, hang it within the level where children can easily reach.

You can also cut out a picture from your Royalty free Christmas clipart graphic images package and glue them to the paper chain, one picture a day.


Christmas Clipart - The Many Uses


The potential number of uses for Clipart in documents and web design is infinite. The only thing limiting the creative use of images is the imagination and ability of the user. Just a few interesting pictures downloaded from online sources and used as Clipart can improve the look of virtually any document and the right images will transform it into one that people will actually want to look at and enjoy.

Artwork and photographs can tell stories in ways that no amount of words can, and Clipart does basically the same thing. The right picture can enable readers or viewers to visualize what the writer is describing. Using Clipart beside text will make a few descriptive lines come alive.

What Is Clipart?

The term 'Clipart' refers to images that can be copied from a source and easily pasted into a document in a computer. An example of such art would be a stylized letter or a picture of a Christmas tree that could be pasted on a Christmas card or menu.

Where to Find Images to Use as Clipart?

  • Websites such as Clipart.com
  • Publishing programs such as Microsoft Publisher. Many publishing programs contain a data base of artwork that can be used in any document
  • Your own pictures or designs that can you paste into a document such as a Christmas card
  • All over the internet
  • Scanned pictures and drawings

Something to remember is to never use artwork unless you know it is in the public domain. Many popular images such as cartoon characters, logos, comic book characters, pictures of movie stars and signers are copyrighted. This means you could get into legal trouble by using such images without paying for them or getting permission.

Use Christmas Clipart to Enhance Documents

The variety and widespread use of artwork and other images found online are limited only by a person's creativity. If you want to create your own unique holiday cards or if you simply want to e-mail a letter, you can customize it by embedding a Clipart. During the holiday season there are many great uses for Christmas Clipart:

  • Christmas Clipart cards: a person can use Clipart and a printer to create their own Christmas cards
  • Christmas stationary: one could paste Christmas images such as trees, Santa or snowmen onto the stationary and create a beautiful Christmas stationary
  • PowerPoint presentations. Adding a few Christmas Clipart images or other holiday images could really spice up a PowerPoint during that time of year.
  • Invitations: Christmas Clipart look great on invitations to holiday parties and other events.
  • Posters and fliers: Professional grade images can really enhance posters and flyers that advertise holiday parties and other events.

All of these items can easily be created with artwork found online or on a computer. The average person should be able to locate all of the images needed to create such artwork in a few minutes and simply use Clipart to include them in their document.


Use Free Christmas Clip Art In Your Holiday Craft Projects!


It's hard to believe, but Christmas is right around the corner, now is the time to start your Christmas and holiday craft projects. You can use free
Christmas clip art found on the internet to spice up your web site or holiday greeting cards. With a simple Google image search for Christmas clip art, you can find hundreds of free images for download which you can use in all of your holiday projects. Not only will you find lots of great free Christmas images to download, but you can also find Christmas craft projects for the entire family with a quick search.

Some of the cool holiday and Christmas images that you will find are Santa images, Christmas tree images, wreath and holly clip art images, and snowmen and other holiday characters. If you have access to a photo program like Photoshop or something similar, you can download the images directly to your computer and then edit them in your photo program.

Scale them to different sizes, change colors and create your own Christmas creation. Many of the holiday clip art images you will find are outlined with no fill colors. This means you can download and print these images, which make perfect coloring projects for the kids.

It can be a lot of fun to create your own holiday greeting cards by using a text or image program, combined with free Christmas clip art that you download from the internet. You can select which images you want to use in your greeting cards and customize them to be completely original. If you have your own blog or website, you can also upload the clip art images to decorate your pages for the holiday season. So if you're starting your holiday craft projects, do a quick google search or you can visit this link for tons of free Christmas clip art images.


Super Christmas Clip Art


Christmas clip art are images that may be downloaded and used in many ways. You may want to send out an e-mail to a business colleague, a friend or loved one. Clip art gives you the freedom to design your own well wishes and can be fun for the whole family.

The kids may wish to design cards for friends at school or tags for gifts. Simply choose the images you wish to use copy, past add your content and print or e mail.

They come in various types for example.

  • Vintage Christmas Clip Art
  • Animated Christmas Clip Art
  • Christmas Tree images
  • Religious Christmas Clip Art
  • Santa Pictures
  • Christmas Pictures
  • Christmas Designs and so much more.

Many websites offer free images or pictures, however it is important to know that you cannot use just any as these are owned by company's or individuals under copy licence and could get you into trouble. My advise would be to ensure that they have the distribution rights or are the owners of these images before downloading. Ensure the quality is good.

There are many company's selling packs, the advantage of this is that once you have purchased the pack it is yours forever and can be used year in and year out. By choosing the right pack also gives you a wider variety that may be used for many types of people or religions and allows you to custom design what ever you feel is appropriate.

You may wish to start a Christmas card and gift tag business simply choose the images you like and print your own an sell to small stores or colleges. In these times any additional income is welcome. You may wish to design Christmas Animated e-mails for company's and send them out to there clients for a fee.


Christmas Tree Clip Art - Where to Find Them


Santa Claus, snowman, elves, reindeer, lanterns, lights, and more symbolize one of the most celebrated times of the year- Christmas. It is the best time to give gifts, share your blessings, decorate your homes, prepare delicious foods on the table, visit relatives, and many more. One of the best ways to decorate your room or house is by using Christmas tree clip art.

Christmas will not be complete without Christmas trees. If you wish to make your house more Christmas inspired, you can do so through Christmas clip art. You can use them to draw trees which you can tape on your window or hang on your life-size Christmas tree. You can even use it adorn your Christmas cards or use it in making gift tags.

Below are the top places where you can find a wide selection of Christmas clip art:

• The internet
Thanks to the internet now you have access to almost everything you need especially Christmas clipart. All you have to do is search the web using your reliable search engine. Just type Christmas tree clip art and you will be given links to many websites that offer free downloadable ones.

• Bookstores
Your local bookstores have them which you can buy at affordable prices. You can select from different designs and various materials. You can also buy other cliparts related to Christmas.

• Magazines
Now that Christmas is here, more magazines are featuring anything that has something to do with Christmas including free Christmas tree clip art. Just grab yourself a copy and enjoy reading the magazine and get yours as well.

• Friends
If you find it hard to look for it, you can run to your friends. Surely, they will have something for you. Just like you, they are also interested in anything that has to do with Christmas. Later on, you can swap with each other and have fun working on your Christmas decors.

You can easily find Christmas tree clip art in the internet, bookstore, magazine, and even your friends. They serves a lot of purpose this season so you better find one soon.

You can personalize your cards and holiday stationary with beautiful and festive Christmas tree clip images art. Popular Christmas holiday clip images can include everything from Santa Claus to Christmas reindeer to Frosty the Snowman, and much more. The clip art can also be used for a variety of Christmas crafts projects.

Read more...

Bela Fleck and The Flecktones 2011.10.19 Culture Room Fort Lauderdale, FL

Thursday, October 20, 2011

Repost from the NewTimes Broward/Palm Beach website found here.


Live: Bela Fleck & The Flecktones at Culture Room, October 19

Categories: Concert ReviewLast Night
Bela Fleck & The Flecktones 1.jpg
Photo by Adam Smith
Bela Fleck & The Flecktones
(Original Lineup)
Culture Room, Fort Lauderdale
Wednesday, October 19th, 2011

Better Than: 
Bela Fleck & The Flecktones with Jeff Coffin on saxophone.

Hot off their chart topping new album Rocket Science with the original Flecktones lineup of Victor Wooten (bass), Roy "Future Man" Wooten (Drumitar, percussion) and Howard Levy (piano, harmonica), Bela Fleck (banjo) and the guys proved that after over 20 years they are still pushing the progressive envelope. As masters of their respective instruments and possessing a reputation of defying genre classification, an certain level of expectation proceeds the outfit. They are more about jazzing up world rhythms than sticking to jazz molds, and more inclined to fuse bluegrass and funk than dwell in the fusion spectrum. After an extensive summer tour playing theaters, sheds and festivals all over the U.S. and Canada, the quartet of virtuosos kicked of an early October run through the South that included a stop at the intimate Culture Room in Fort Lauderdale.

The Culture Room brought in numbers and the room was filled to capacity when the guys took up their respective instruments. The start of the set was oddly punctual and kicked off right around the 9 p.m. mark. "Gravity Lane," the opening track of the new album, served as a warm up tune before the band launched into a series of greatest hits, crowd favorites, and choice new selections. A theme of using older tracks as jump off point for segues into fresh material from Rocket Science worked well in maintaining a balance of sound range and the audience's attention.
"Sex In a Pan" from 1992's UFO Tofu was phased into "Life In Eleven," a Levy track that references his use of 11/8 time, something he calls, "really funky, but to me feels totally normal." That is not normal, but this is the same guy that was the first to use overblow and overdraw techniques for chromatic playing on the diatonic harmonica. Another UFO track came with an upbeat version of "The Yee-Haw Factory" before dropping into a smoothly slowed down and jazzed out "Prickly Pair."  
Grammy nominated violinist Casey Driessen came out to show off his violin skill set and engaged Levy in multiple duels. The winner of each was debatable, but the competition pushed the entire band into high energy peaks that were rewarded by ovations from the audience. He would return a handful of times through out the night. Things went way back to the self titled record next with "Flipper" and "Sunset Road" sandwiching 1991's "Flying Saucer Dudes" from Flight Of The Cosmic Hippo." Old school fans were elated by the series of throwback cuts and the band rewarded the crowd energy with jaw dropping solo trading. Whether it was Fleck switching between his traditional and rock guitar tone mandolins, Future Man on the drumitar or traditional kit, Levy on harmonica or Steinway baby grand, or Wooten on his yin-yang 4 string or aquamarine 5 string bass, the multidimensional conglomerate held nothing back. 
A two hour and forty minute continues set continued with two more new songs before crushing both crowd favorites "Sinister Minister" and "Blu-bop." Fittingly bookending the set where "Gravity Lane" began, the guys extended the bass driven "Bottle Rocket," the final track of Rocket Science, before walking off stage. 
The insatiable crowd took the opportunity to release a great deal of pent up energy that brought a smiling band back on stage. The final result can only be called an exposition on how Fleck can capture such a large amount of sound while alone on stage. Lets just say he even tried to play with his teeth. Future Man was also left to his own devices as he put on a drum clinic before the band returned to the stage to round out the encore with an Earth shattering bass solo from Wooten during Flight Of The Cosmic Hippo. 
Critics Notebook:
The Crowd: Top heavy mix of an older crowd mixed in with energetic young jazz heads. The room was packed in from wall to wall with little room to move.  

Personal bias: First time seeing the original lineup and Levy stole the show with the dynamic and energy he brings to the band. The tracks from Rocket Science bring back the original sound combined with musical evolution and wisdom.  

Overheard:  "So I got to Fort Lauderdale and went to one of those massage parlors...yeah" - Victor Wooten in between songs.  Intermittent bursts of the loudest yelling possible by a particularly excitable member of the audience. 

Read more...
Sonic Run: Internet Search Engine
Related Posts Plugin for WordPress, Blogger...

  © Blogger template Brownium by Ourblogtemplates.com 2009

Back to TOP